Raspbian OS (lesson)
![]()
developer
Install and configure a working Operating System image.
qualifying statement
Learners will use standard raspberrypi foundation deployment techniques to obtain, install and configure an operating system on their sdcard.
outcomes
The result will be a working sdcard image that may be placed into any raspberry pi computer model 3 and above.
(Note: not the pico, which is a micro-controller that does not run an Operating System.)
overview
We are going to look at using the raspberry pi foundation Desktop images:
- https://www.raspberrypi.com/software/operating-systems/#raspberry-pi-os-64-bit
- https://www.raspberrypi.com/software/operating-systems/
In this lesson you will learn how to
- download the .deb Ubuntu rpi-imager package (note: that Ubuntu is a derivative of Debian)
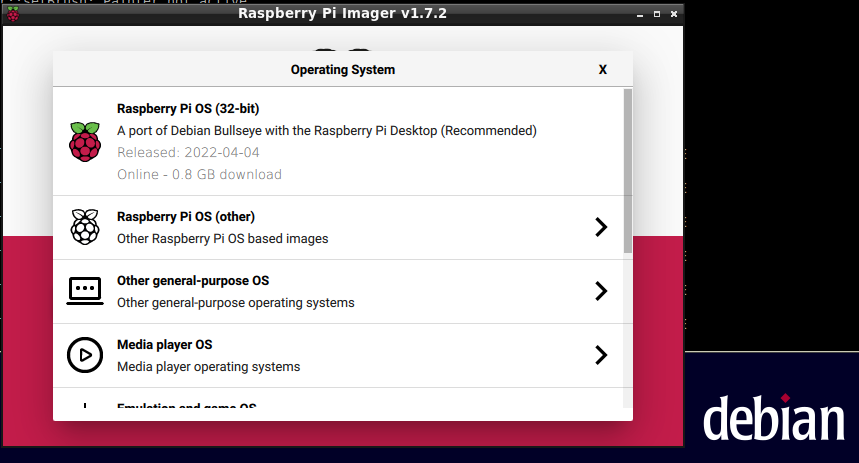
- how to select the operating system
- install the sdcard
- and configure your raspberry pi OS
instructions
- start a shell and install curl if not present
sudo apt install curl
- download the rpi-imager (for Ubuntu and Debian on X86).
curl -L https://downloads.raspberrypi.org/imager/imager_latest_amd64.deb > raspi-imager.deb
- (alternate) using browser
https://downloads.raspberrypi.org/imager/imager_latest_amd64.deb
- (alternate) for Windows (and then run it)
https://downloads.raspberrypi.org/imager/imager_latest.exe
- alternate for MacOs
https://downloads.raspberrypi.org/imager/imager_latest.dmg
- run the imager as a regular user application on your selected operating system (we are using Debian in our illustration)
sudo rpi-imager

- locate Raspberry Pi 64bit operating system

- choose the Storage to update

- configure some options along these lines:
- hostname
- enable SSH
- set username and password
- configure wireless LAN
- be sure to select your country e.g. AU
- set local
- use the US keyboard

- save the configuration
- write the image to the storage (e.g. sdcard)
The rpi-imager will download the image from the www and write to your card. This will take a little bit of time to complete and you can watch the progress bar.
We chose to use curl to download the rpi-imager for convenience; you could have used a browser download and then located the file in ~/Downloads to install it as an alternate way to curl.
running
Now lets run the image:
- make sure the power is off on your pi
- install the card into a raspberry pi/pi400
- make sure you have your peripherals connected:
- mouse
- keyboard
- display
- network if you have a physical network cable
- turn the pi on and wait for a prompt
There are other things we can do after this lesson. You might like to install
- Lesson:libreoffice using apt
- install a headless image.
(See Special:WantedPages for those we need to complete.)
other operating system selections
There are several images available that can be seen by walking through the rpi-imager. We will explore some of these in other lessons.

- multimedia

- emulation and games

- other specific-purpose OS

- erase: format the card FAT32

review
- start a browser and review what you have done by watching https://www.youtube.com/watch?v=BpJCAafw2qE on your raspberry pi (or a laptop if you only have a pi 3 and it is too slow).
Hint
If you have a working raspberry pi desktop and a USB sdcard carrier you can probably navigate to this lesson and run the installer on your raspberry. Take care not to overwrite your active sdcard. You may also like to perform a backup by following lesson:backup sdcard for those with a laptop.