Time server using raspberry pi (project)
Introduction
This material was supplied by Arising Technology Systems Pty Ltd and has contributed to the installation of two Stratum 1 time servers used internally in their network. This is an advanced project.
What you will need hardware wise:
- raspberry pi (preferably a 3 or better)
- a good micro USB 2.5 to 3 Amp power supply (otherwise things won't go good for you)
- heatsinks for the processors, and maybe a fan in a box
- a GPS module with a serial port and 1 PPS, and one that supplies an external antenna socket (my cost U$8.14 each - ranging up to $36)
- a plastic case with some way of mounting the GPS module so its integral antenna can see the sky (for portable use)
- to improve reception, you can use an external active patch antenna of at least 28dB gain and at least 1.5 dB NF (for a max gain of approximately 50 dB) - these are available from ebay ranging from $6 to $36. They are just a plastic dongle, with a ceramic patch antenna inside of questionable radiation pattern, with an active amplifier that works with a supply voltage between 2.5 and 3.7 volts, and a cheap magnet and plastic covering the base.
- a 20*2 header socket (if you can't find one of those use an IDC socket, and you can bend the pins down on the IDC socket and solder to them if you do not want to use a full ribbon cable).
- soldering iron and solder
- wire-wrap, hookup-wire or ribbon cable - your preference.
I originally used a hat board in my first unit - but these are better for prototyping, they make your pi heavy and hot. It's better to have air circulating over the processors, preferably with a fan, rather than filling the space with a PCB, and screw stand-offs.
I initially tried #using NTP as the time daemon, and it is woefully inadequate, being unable to handle jitter and differences that occur as your system is starting from fresh, particularly if you have disassociated your pi from the NTP servers during the dhcp assignment and from system-time synchronisation. (See #stabilise).

It's a bit of a mechanical hack (what can I say?) I made my piaware pi have dual purpose with the installation of a GPS module.

Errors are of the order of 10's of metres when running with the intrinsic antenna, but reduced to the order of 1 meter hozizontal when running with the 28dB antenna (so get a better antenna).


This is a hobbyist module, supplied for Arduino use. I originally tried the one that had an external ceramic dipole-like patch and it never acquired any satellites after 24 hours. Admittedly it was a 10 year old unit that as far as I know had never been turned on. Thus the need for the above unit with an external antenna connector, and its intrinsic patch antenna (for use on an aeroplane glare-shield when portable). This unit's signals improved to reported 30 dB S/N ratio (from a max of 10 dB S/N) with the external antenna sitting on top of my UPS working through a concrete tile roof without sisalation on the top of my office cabinet (poor-man's computer rack). Thus the antenna is closer to having 20 dB of gain (what do you expect for $6?).
system updates
- update your SDCard/OS using the piaware repository, because it's at buster and faster than the official raspberry pi repo. You might even want to run piaware on your time daemon box like I do, it won't hurt it, it's only power and money.
Via the following
- use the piaware repo
sudo wget http://flightaware.com/adsb/piaware/files/packages/p/piaware-support/piaware-repository_3.7.1_all.deb
sudo dpkg -i piaware-repository_3.7.1_all.deb
- update the package list using the new repo
sudo apt update
- optionally install piaware stuff
sudo apt install piaware
sudo apt install dump1090-fa
- install the gpsd daemon for monitoring your GPS module (it automatically chooses parser/handlers to service messages, which includes being able to handle the very common NMEA-0183 format)
sudo apt install gpsd
- install the gpsd clients - which you can use to monitor gpsd
sudo apt install gpsd-clients
sudo apt install python-gps
- install the ppstest command - which you will use to watch /dev/pps1
sudo apt install pps-tools
- install the following so you can find open file descriptors
sudo apt install lsof
using pps
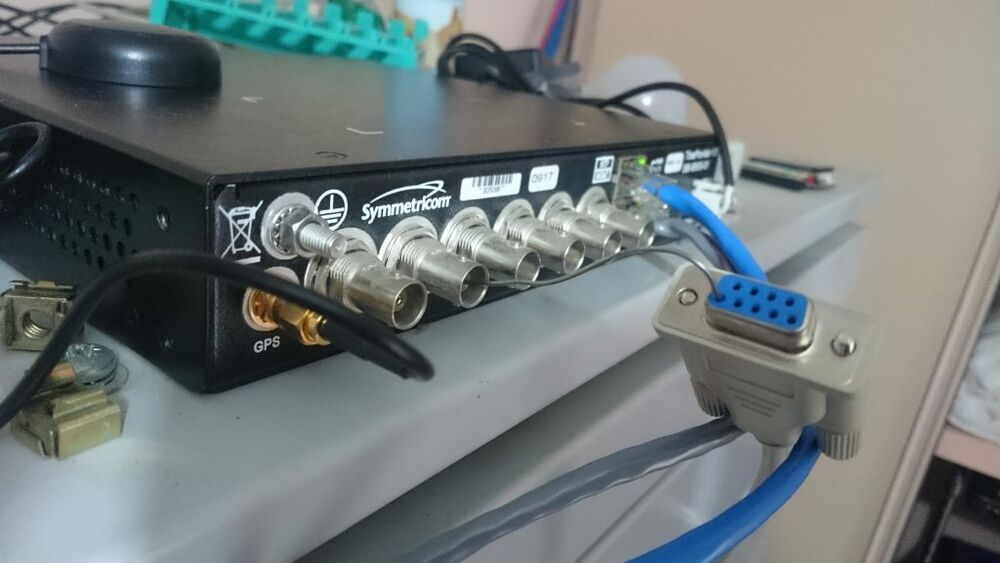
Looks like a sysop had to use an expensive GPS box sporting a IEEE-802 cable and resort to a serial patch cable to obtain the more accurate 1 PPS - lol.
-
1PPS
It turns out that the PPS signal is compatible with the logic levels of the DCD line

It is a little easier on the raspberry pi [note 1]
- source a GPS module that operates at raspberry pi favourable voltages; an Arduino GPS module would be suitable, provided it has 1 PPS and has been manufactured since the last GPS date roll-over.
- suitable wire and a header socket or similar and a means to mount your GPS module
- decide on which GPIO pin you will connect to 1 PPS (I used GPIO 23), connect the 1 PPS to the GPIO pin.
- connect the board TX line to the pi RX line; I left the module RX line disconnected because the pi was sending garbage to the module
- connect the module Vcc to 3.3v (and not the 5 volt)
- connect the ground
- disable the console access to the pi serial port (advanced option in config serial disable)
- select 5 interfacing options > 6 serial to disable shell and kernel messages on serial connection.
sudo rasp-config
- assign the UART (e.g. the mini UART is connected to /dev/stty0) - this requires using the mini UART overlay.
- enable gpio overlay
Edit /boot/config.txt and include:
# ################################################
#
# RBH clocking

arm_freq=1000
arm_freq_max=1000
# fix the clock
force_turbo=1
nohz=off

# RBH enable uart

enable_uart=1
dtoverlay=pps-gpio,gpiopin=23
- edit /boot/commandline.txt and remove the console=tty1 to stop it polling console and waiting for login on it as tty1 will be used for the gpsd
dwc_otg.lpm_enable=0 root=PARTUUID=d3e1179d-02 rootfstype=ext4 elevator=deadline fsck.repair=yes rootwait net.ifnames=0 quiet splash plymouth.ignore-serial-consoles
- and after wiring is complete turn your pi on and login
- set the serial port baudrate
sudo stty -F /dev/ttyS0 speed 9600 cs8 -cstopb -parenb && echo -n > /dev/stty0
- watch the serial line for messages from the GPS module
sudo cat /dev/ttyS0

If you see messages, particularly GSV with satellites in view, then all good and you can do some further testing:
- watch the 1 PPS transition:
sudo ppstest /dev/pps0

You should notice the system time stamp reported at the time the 1 PPS rising edge was detected.
- now is a good time to source the leap-seconds.list from a reputable supply
cd /usr/share/zoneinfo
sudo wget https://www.ietf.org/timezones/data/leap-seconds.list
configure gpsd
# Default settings for the gpsd init script and the hotplug wrapper.

# Start the gpsd daemon automatically at boot time
START_DAEMON="true"

# Use USB hotplugging to add new USB devices automatically to the daemon
USBAUTO="true"

# Devices gpsd should collect to at boot time.
# They need to be read/writeable, either by user gpsd or the group dialout.
#DEVICES="/dev/ttyAMA0"

# RBH it works on the simple UART too
DEVICES="/dev/serial0 /dev/pps0"

# Other options you want to pass to gpsd
GPSD_OPTIONS="-n"
A technical paper describing gpsd https://www.aosabook.org/en/gpsd.html [1]
How to hack https://gpsd.gitlab.io/gpsd/hacking.html [2]
The gpsd project https://gpsd.gitlab.io/gpsd/index.html [3]
Clients https://gpsd.gitlab.io/gpsd/gps.html [4]
Example client code https://gpsd.gitlab.io/gpsd/gpsd-client-example-code.html [5]
stabilise
- you may wish to stop the CPU frequency modulation to reduce jitter (I did not bother), add to your /boot/cmdline.txt
nohz=off
- turn off systemd-timesyncd (I did this)
sudo systemctl stop systemd-timesyncd.service
sudo systemctl disable systemd-timesyncd.service
- You may configure the system to run at full performance which uses more power to lower 1PPS latency (I did the opposite and set my governor to powersave),
sudo apt -y install cpufrequtils
sudo echo 'GOVERNOR="performance"' > /etc/default/cpufrequtils
sudo systemctl restart cpufrequtils
- or lock your CPU to one frequency via the /boot/config.txt
# Meaningful word.. This means 'enable cpu freq scaling'
force_turbo=0
# Set lowest cpu freq. By default, it's 700.
arm_freq_min=1600
- ntp-servers are specified in /etc/dhcp/dhclient.conf
...
#supersede domain-name "fugue.com home.vix.com";
#prepend domain-name-servers 127.0.0.1;
request subnet-mask, broadcast-address, time-offset, routers,
     domain-name, domain-name-servers, domain-search, host-name,
     dhcp6.name-servers, dhcp6.domain-search,
     netbios-name-servers, netbios-scope, interface-mtu,
     rfc3442-classless-static-routes , ntp-servers;
#require subnet-mask, domain-name-servers;
#timeout 60;
...
- Remove or comment out "ntp-servers" from /etc/dhcp/dhclient.conf
...
# A list of options to request from the DHCP server.
option domain_name_servers, domain_name, domain_search, host_name
option classless_static_routes
# Most distributions have NTP support.
# option ntp_servers
# Respect the network MTU.
...
- Delete these related files:
/etc/dhcp/dhclient-exit-hooks.d/ntp
/lib/dhcpcd/dhcpcd-hooks/50-ntp.conf
/var/lib/ntp/ntp.conf.dhcp (might not exist)
A reboot is warranted for this to take effect. At this point, you will be able to configure your time daemon entirely without interference from the rest of the system.
chrony & PPS
Chrony is much better at synchronising to hardware PPS without marking the PPS as a bad-ticker just when timing is about to start.
- obtain ntpdate for snooping etc
sudo apt install ntpdate
- install chrony
sudo apt install chrony
- synchronize your system clock with the www pool by running an initial chrony config without your GPS and PPS refclocks active
keyfile /etc/chrony/chrony.keys

driftfile /var/lib/chrony/chrony.drift

log tracking measurements statistics
logdir /var/log/chrony

maxupdateskew 100.0

# no RTC on pi
#rtcsync

allow

# Step clock by 1 second for each up to 5 seconds of drift
makestep 1 5

# the pool I use when in au
server 0.au.pool.ntp.org
server 1.au.pool.ntp.org
server 2.au.pool.ntp.org
server 3.au.pool.ntp.org

# gpsd feeding NMEA time to SHM 0 and 1 PPS connected to /dev/pps0 (delay just stops hunting between PPS and NMEA references)
#refclock SHM 0 offset 0.1225 delay 0.2 refid NMEA precision 1e-9 trust
#refclock PPS /dev/pps0 lock NMEA
- start gpsd and chrony
sudo systemctl start gpsd chrony
- run gpsmon to see the adjustment required to set your GPS time to net time
gpsmon
- take the offset you see in gpsmon and insert it into your /etc/chrony/chrony.conf refclock offset and uncomment the two refclock lines
# gpsd feeding NMEA time to SHM 0 and 1 PPS connected to /dev/pps0
refclock SHM 0 offset 0.122500000 delay 0.2 refid NMEA precision 1e-9 trust
refclock PPS /dev/pps0 lock NMEA
- restart chrony
sudo systemctl start chrony
- watch the PPS drift against the clock via:
sudo ppstest /dev/pps0
- or via gpsmon (look at the PPS delta)
gpsmon
- and watch your chrony source effectiveness via
for (( ; ; )) do chronyc sources; sleep 5; done
- or via:
sudo ppstest /dev/pps0
- test your clock against another NTP server (-q means query only, -p 1 means only 1 poll so you don't flood the NTP server)
sudo ntpdate -p 1 -q ns1.anu.edu.au
supplementary
overlay rootfs
Once you have all the configuration established it is time to boot the system so rootfs resides within an overlayfs.
On later pis this can be done by running raspi-config using the performance options. I prefer to keep the /boot outside the overlayfs so I can modify boot options (carefully).
On previous models running buster or earlier, then the overlay mode needs to be scripted.
See overlay rootfs
bibliography
- https://gpsd.gitlab.io/gpsd/gpsd-time-service-howto.html#_chrony_performance_tuning
- https://chrony.tuxfamily.org/doc/3.1/chrony.conf.html
- https://gpsd.gitlab.io/gpsd/troubleshooting.html
- http://leapsecond.com/java/gpsclock.htm
using ntp
Note: you must turn off the dhcp sourcing of ntp servers when you are running your own time servers, because dhcp will replace your /etc/ntp.conf contents with its own sources from the switch!!!! (Somewhere on my system a box is promulgating the wrong address for one of my Stratum-1 sources and ruining my network time coordination.)
You might want to skip NTP completely because it doesn't handle the intial starting conditions of outlying clocks. Use chrony instead, because I believe it is more resilliant. If you have a wandering clock, or you have disabled time-updates (because you want your refclock to be a master), then you can try the following and see what I mean. It's really hard to beat 1,200nS +/-428nS precision, which is what I am seeing with my pi running Chrony and a u-blox 6M GPS module I purchased from China for $14.00 (only one module out of 5 was broken with a shorted antenna section that blew up an unmarked rf amplifier chip).
If you want to use NTP then you have been warned ...
- obtain ntpdate
sudo apt install ntpdate ntp
- build a version of ntp that knows about pps
sudo apt-get build-dep ntp
sudo apt-get install pps-tools ubuntu-dev-tools
sudo apt-get source ntp
- create the ntp package and install it
- cd <The ntp version directory something like ntp-4.2.6.p5+dfsg >
sudo dpkg-buildpackage -uc -us -nc
- install it via
sudo dpkg -i ../ntp*.deb
- or force install it if it has dependencies that are broken (be careful)
sudo dpkg -force-all -i ../ntp*.deb
- To avoid that apt doesn't run with the ATOM clock support, use
sudo echo ntp hold | dpkg --set-selections
- source the leap-seconds.list from a reputable supply
cd /usr/share/zoneinfo
sudo wget https://www.ietf.org/timezones/data/leap-seconds.list
- now configure ntp.conf
configuring other system ntp servers to use ntp.arising.com.au
You need to modify /etc/ntp.config in your other systems if you want to use the local Stratum-1 time source, instead of the www pools
- vi /etc/ntp.config and comment out the pool and replace with the server ntp.arising.com.au
# pool.ntp.org maps to about 1000 low-stratum NTP servers.  Your server will
# pick a different set every time it starts up.  Please consider joining the
# pool: <http://www.pool.ntp.org/join.html>
#pool 0.debian.pool.ntp.org iburst
#pool 1.debian.pool.ntp.org iburst
#pool 2.debian.pool.ntp.org iburst
#pool 3.debian.pool.ntp.org iburst

server ntp.arising.com.au
- reboot and verify that all is well
ntpq -p
     remote           refid      st t when poll reach   delay   offset  jitter
==============================================================================
*ntp.arising.com .PPS1.           1 u   24  256  377    0.442    0.114   0.118
- and check timedatectl
timdatectl
overclocking
- https://www.raspberrypi.org/documentation/configuration/config-txt/overclocking.md
- https://www.tomshardware.com/how-to/raspberry-pi-4-23-ghz-overclock
hardware
parts
| parts | supplier | image |
|---|---|---|
| raspberry pi | raspberry pi - Core Electronics | 
|
| pi box | RS Components | 
|
| pi plug-pack | RS components | 
|
| HAT scratch board | RS components | 
|
| Neo6 GPS module | ALiExpress | 
|
| Neo7 GPS | ebay | 
|
GPIO pinout


notes
- ↑ Do not work on the raspberry pi=, headers etc, with power connected to the raspberry pi.
bibliography
- neo6 gps module https://www.u-blox.com/en/product/neo-6-series
- https://www.u-blox.com/sites/default/files/products/documents/NEO-6_DataSheet_%28GPS.G6-HW-09005%29.pdf
- u-blox Neo 6M https://www.u-blox.com/sites/default/files/products/documents/NEO-6_DataSheet_(GPS.G6-HW-09005).pdf
- https://www.instructables.com/id/How-to-Communicate-Neo-6M-GPS-to-Arduino/=
- https://randomnerdtutorials.com/email-alert-system-on-location-change-with-raspberry-pi-and-gps-module/
- uart https://www.raspberrypi.org/documentation/configuration/uart.md
- NTP Server https://www.satsignal.eu/ntp/Raspberry-Pi-NTP.html
- gpsd https://www.satsignal.eu/ntp/Raspberry-Pi-NTP.html#trimble
- best references
- http://www.unixwiz.net/techtips/raspberry-pi3-gps-time.html
- documentation https://gpsd.gitlab.io/gpsd/index.html#documentation
- hacking https://gpsd.gitlab.io/gpsd/gps-hacking.html
- repos https://gitlab.com/gpsd/gpsd
- client https://gpsd.gitlab.io/gpsd/client-howto.html
- java client https://github.com/ivkos/gpsd4j
- pps https://www.kernel.org/doc/html/latest/driver-api/pps.html
- MRS https://blog.meinbergglobal.com/2014/05/12/asymmetric-network-delay-ntp/
- TAI https://blog.meinbergglobal.com/2019/04/15/ptp-timescale-and-what-the-heck-is-arb-time/
- au NTP servers
| Servers |
|---|
| 0.au.pool.ntp.org |
| 1.au.pool.ntp.org |
| 2.au.pool.ntp.org |
| 3.au.pool.ntp.org |
- tuning https://gpsd.gitlab.io/gpsd/gpsd-time-service-howto.html
- multilateration https://en.wikipedia.org/wiki/Multilateration
references
- ↑ description https://www.aosabook.org/en/gpsd.html
- ↑ gpsd haclking https://gpsd.gitlab.io/gpsd/hacking.html
- ↑ gpsd https://gpsd.gitlab.io/gpsd/index.html
- ↑ gpsd clients https://gpsd.gitlab.io/gpsd/gps.html
- ↑ example client code https://gpsd.gitlab.io/gpsd/gpsd-client-example-code.html
